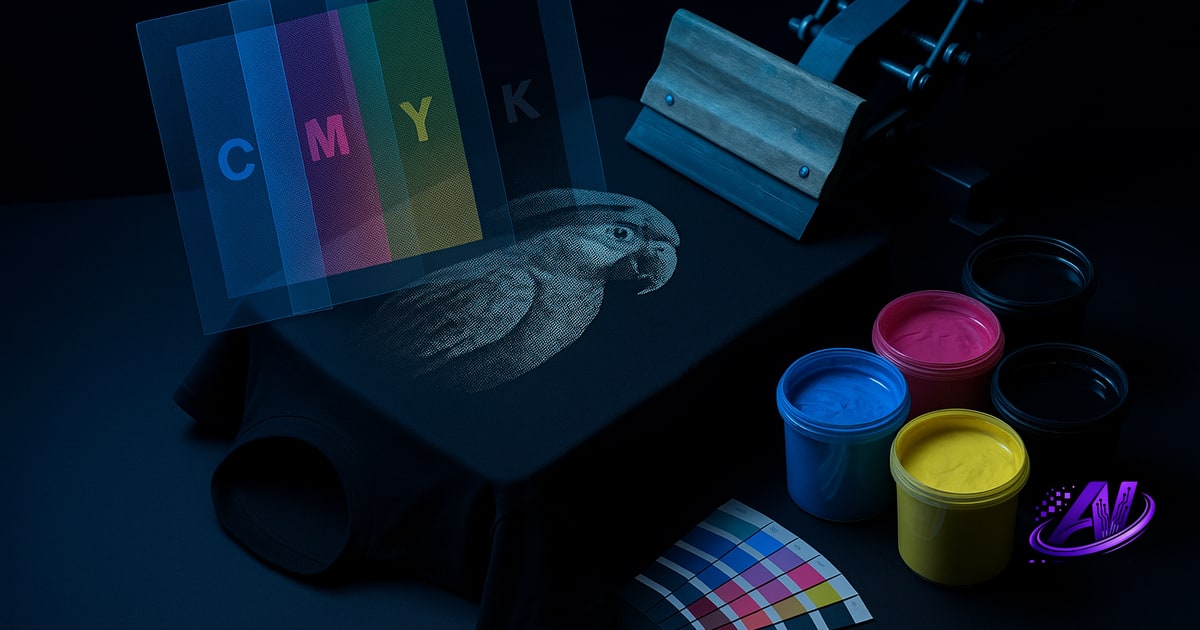
Why Separate Colors for Screen Printing?
Every screen in a multicolor print job carries one ink. To build a full-color design — whether a simple two-color logo or a full simulated-process photo tee — you need to break the artwork into individual layers (separations), one per screen.
Each separation is a black-and-white bitmap that tells the screen maker where ink goes and where mesh stays clear. On press, those screens layer up in register: underbase white, then each spot or halftone color, then any highlight white on top.
Photoshop can do this work. It's not purpose-built for screen-print separation, so the process is manual, channel-driven, and slower than dedicated tools — but if you already own a Creative Cloud license and print mostly spot-color or low-complexity designs, the channel workflow gets the job done.
How Do You Separate Colors in Photoshop for Screen Printing?
Photoshop offers three main paths, depending on your design:
- Indexed Color mode for vector-style spot-color designs (logos, text, clipart). Convert the RGB or CMYK file to Indexed Color with a limited palette (2–8 colors), then split those into individual layers or channels.
- CMYK channel splitting for process or simulated-process work. Convert to CMYK, examine each channel (Cyan, Magenta, Yellow, Black), and export them as grayscale bitmaps. You'll still need to hand-paint or mask an underbase and handle trapping.
- Manual layer isolation: use the Magic Wand, Color Range, or Quick Selection to isolate each color onto its own layer, clean up edges, add chokes or spreads, then flatten each layer to a bitmap.
Whichever route you choose, the goal is the same: one black-and-white file per screen, at the correct resolution (300 DPI art for halftones; higher for film output), with proper trapping so inks don't leave white gaps on press.
Plan on 15–45 minutes per design, longer if you're painting masks for simulated process or fixing color bleed in gradients.
Step-by-Step: Spot-Color Separation with Indexed Color Mode
This is the fastest manual method for clean vector art, text, or simple graphics with fewer than eight distinct colors.
1. Flatten and size your file. Merge all layers, confirm your canvas is print-size at 300 DPI, and convert to RGB mode (Image → Mode → RGB Color) if you're not already there.
2. Convert to Indexed Color. Go to Image → Mode → Indexed Color. Set Palette to Local (Perceptual) or Adaptive, Colors to match the number of inks you want (usually 4–6 for a typical job), Dither to None. Click OK. Photoshop reduces your art to exactly that many flat colors.
3. Switch back to RGB. Image → Mode → RGB Color. Your layer stays flat, but now you can use selection tools.
4. Isolate each color. Use the Magic Wand (set Tolerance to 0, Contiguous unchecked) to select one color. Copy-paste it onto a new layer, or use Select → Save Selection to store it as an alpha channel. Repeat for every color, including white underbase if needed.
5. Export separations. Hide all but one layer, flatten, convert to Grayscale, and save as a TIFF or PNG named by color and screen order (e.g., 01_white_underbase.tif, 02_red.tif). Repeat for each screen.
This workflow is clean and repeatable for spot-color jobs. It breaks down when you have photographic imagery, gradients, or simulated-process color blends — those require halftones and channel painting, covered next.
Step-by-Step: Simulated-Process Separation via CMYK Channels
Simulated process uses halftone screens (usually 45–55 LPI) in custom ink colors to reproduce a full-color photograph or complex gradient on dark garments. Photoshop's CMYK mode gives you four channels to start, but you'll need to hand-tune them for screen printing.
1. Convert to CMYK. Image → Mode → CMYK Color. Photoshop splits your image into Cyan, Magenta, Yellow, and Black channels, visible in the Channels panel.
2. Examine each channel. Click each one in the Channels panel. You're looking at the ink density for that color. Dark areas print heavy, light areas print as sparse halftone dots. Often the auto-conversion over-saturates or misses skin tones — you'll need to paint corrections with a soft brush at low opacity.
3. Add an underbase. CMYK mode does not generate white. Duplicate the composite layer, desaturate it, invert if needed, and paint a mask that covers all colored areas. Save this as a fifth channel or a separate grayscale file labeled 00_white_underbase.tif.
4. Handle trapping. Use Filter → Other → Minimum (choke) or Maximum (spread) on individual channels to create slight overlaps and prevent white gaps. This step is manual and requires test-printing to dial in.
5. Export as grayscale bitmaps. For each channel, make it visible and all others hidden, then Image → Mode → Grayscale (don't merge). Save as TIFF. Repeat for all colors plus white.
Simulated-process jobs in Photoshop routinely take 30–60 minutes once you include underbase painting, channel cleanup, and test separations. If you're doing this daily, the time cost adds up fast.
Does Photoshop Have a Color Separation Tool?
No. Photoshop does not include a built-in, one-click color separation tool designed for screen printing. The Channels panel and Indexed Color mode are general image-processing features — they let you manually split an image, but they don't automate underbase generation, trapping, halftone screening, or spot-color matching.
Third-party Photoshop plugins and actions exist (you'll find them sold online or shared in screen-print forums), and some automate parts of the workflow — batch channel exports, quick CMYK splits, or underbase masks. Even with those, you're still working inside Photoshop's raster-editing environment, tweaking masks and painting fixes by hand.
Dedicated AI color separation software — standalone apps purpose-built for screen printers — handles underbase, trapping, halftone LPI, and Pantone or custom-ink matching in a single pass. If you separate more than a few jobs a week, the time saved pays for the tool in the first month.
Common Pitfalls and How to Fix Them
Blurry edges and halftone mush. Your source file is under 300 DPI, or you resized after converting to Indexed Color. Always start at full print dimensions and correct resolution.
White gaps between colors on press. You didn't trap. Add a 1–2 pixel choke (darker color shrinks) or spread (lighter color expands) using Minimum/Maximum filters, or manually paint overlap in the channel masks.
Too many screens for the budget. Indexed Color gave you 12 colors when the customer can afford four. Go back, re-convert with fewer colors, or manually merge similar hues into one channel.
Underbase prints through the top colors. Your white layer is too opaque or not choked. Reduce the underbase density in areas where top colors are dark and saturated, or choke the white by 2–3 pixels so it stays hidden under the ink stack.
Gradient banding. CMYK conversion or Indexed Color dithering artifacts. You'll need to hand-paint a smooth gradient mask in the problem channel, or switch to a higher bit-depth workflow (which Photoshop supports, but screen-print RIPs often don't).
When to Use Photoshop — and When to Switch Tools
Photoshop is a capable choice if you:
- Already pay for Creative Cloud and want to avoid another software license.
- Separate fewer than five jobs a week, mostly spot-color or simple vector designs.
- Enjoy the control of manual channel painting and don't mind the time investment.
- Need Photoshop's advanced masking, retouching, or compositing for custom art anyway.
Consider a dedicated separation tool if:
- You run simulated-process or photographic prints daily — the 30–60 minute Photoshop workflow per job is costing you real labor hours.
- You need to match inks you already stock (Wilflex, FN-INK, custom Pantone mixes) instead of generic CMYK.
- You want automated underbase, trapping, and halftone screening without painting masks by hand.
- You're quoting jobs on the fly and need separation + screen counts + press time + pricing in one pass.
AI Separations is a standalone Windows app that handles all of this — AI-driven simulated process and spot-color seps, white underbase and highlight white, automatic trapping, and an Instant Quote generator for screens, setup, and retail pricing. No Photoshop required, no monthly subscription. It's $179 one-time, and you can try it free at aiseparations.com to compare the workflow side-by-side with your current Photoshop process.
Frequently asked questions
How do you separate colors in Photoshop for screen printing?
Convert your design to Indexed Color mode (for spot-color work) or CMYK mode (for process/simulated-process), then isolate each color using the Magic Wand, Channels panel, or manual layer masks. Export each color as a black-and-white bitmap, adding underbase and trapping by hand. Expect 15–45 minutes per design depending on complexity.
Does Photoshop have a color separation tool?
No, Photoshop does not include a dedicated screen-print color separation tool. You manually separate colors using the Channels panel, Indexed Color mode, or selection tools, then export each channel as a grayscale bitmap. Third-party plugins can speed up parts of the process, but underbase, trapping, and halftone setup remain manual.
What resolution should I use for screen print separations in Photoshop?
Use 300 DPI at final print size for halftone and simulated-process work. Spot-color or simple vector designs can go higher (400–600 DPI) for film output, but 300 DPI is the industry standard for garment printing to balance detail and file size.
How do I add a white underbase in Photoshop?
Create a new layer, paint or mask the areas where color inks will print, then save that layer as a grayscale bitmap. Alternatively, duplicate your composite image, desaturate and threshold it to create a white mask, then choke it by 1–2 pixels so it doesn't show at the edges of your top colors.
Can I do simulated process separations entirely in Photoshop?
Yes, but it's labor-intensive. Convert to CMYK, hand-paint channel corrections for skin tones and gradients, create a separate white underbase layer, apply choke/spread trapping with Minimum/Maximum filters, and export each channel as a grayscale TIFF. Expect 30–60 minutes per design; dedicated separation software automates most of this workflow.
Try it on your own artwork
AI Separations is a standalone prepress & quoting studio for screen printing & DTF — AI color separation, an instant quote, a print-readiness check, and ink matching. No Photoshop, $179 one-time, free trial.